This document contains a sampling of common recording and performance techniques used with Mobius. You do not need to read this top to bottom, look at the index and skip to the sections that interest you.
Note that this document is not yet complete. Many sections are still empty. If you have an interest in an empty section post a request to the forum and we will provide more information there.
The Record function is used to record new loops of live audio. There are several ways to start and stop a recording, in the simplest case you press the Record button once to begin recording, and again to stop recording. Immediately after the second press the loop begins playing and continues until you alter it with another function.
Before a loop is recorded for the first time, the loop is in reset mode and you will see the word Reset appear in the status display. While a loop is recording you are in record mode and will see the word Record in the status display. Unless and advanced record ending option is used, when the recording completes the loop will enter play mode and Play will appear in the status display.
If you want to discard the loop and start over you can use the Reset function to stop the loop, release all loop memory and return to reset mode. From there you can use the Record function again to record another loop.
If you want to discard the loop and immediately begin recording a new one just press Record again with while the loop is playing. The memory for the previous loop is not released until you end the new recording, you can use the Undo function to cancel the new recording and return to the original loop. Note that Undo only restores the previous loop if the previous loop was not empty (in reset mode). Once a loop is reset all history of the loop is gone, you cannot undo from reset mode.
Another way to reset a loop is to press and hold the Record button. This is referred to as a "Long Press Record" and it behaves the same as the Reset function. Using long press Record to reset the loop is a common technique when using a MIDI footswitch. Since you will almost always have a footswitch bound to the Record function you don't need to waste a footswitch bound to the Reset function, you can simply do a long press of the Record footswitch to do a reset. The loop will enter record mode for about 1/2 second (or whatever the configured long press interval is) then the loop will be reset.
Once the loop has been recorded to your satisfaction, you may begin modifying it, or combining it with loops on other tracks.
The function Sustain Record is used with triggers that can communicate both a "pressed" and "released" state. The recording starts when the trigger is pressed and stops when it is released. For a footswitch that sends MIDI notes, the recording would start when the footswitch was pressed, continue while the footswitch was held, and stop when the footswitch was released. This can make it easier to record very short loops.
If the Sustain Record function is bound to a trigger that does not support press/release states, such as a MIDI program change, it will behave the same as the Record function, requiring two presses to start and ending the recording.
The preset parameter Record Mode can be used to change the way the Record function behaves. It has these values:
RecordMode=Safe should be it's own option so you can use it with both toggle and sustain recording.
Synchronized recording is a very complex topic that is covered fully in the Mobius Synchronization manual.
See the MIDI Master Sync section of the Mobius Synchronization manual for more information.
Overdubbing is the process of adding new sound to an existing loop. It is the most common way to modify loops after recording. When overdub is enabled, new sound coming into a track will be merged with the loop that is currently playing in that track. This will result in a new loop containing both the original sound and the new sound.
Unlike many loopers, overdub in Mobius does not replace the original loop. Instead overdubbing creates a new "layer". Remember that loops are not single audio recordings, they are actually made up of several audio recordings called layers. Each time you modify a loop a new layer is created. If you don't like the results of a modification you can return the previous layer with the Undo function.
Overdub is controlled with the following functions.
The Overdub function will toggle overdub on and off each time it is used.
The Sustain Overdub function will turn overdub on when the function button is pressed and turn it off when the button is released. It must be used with a sustainable trigger. This is useful if you want to create very short overdubs. Pressing, holding, then releasing a button is much faster than trying to press a button twice.
The Overdub On and Overdub Off functions turn overdub on and off without toggling. They are intended for use in scripts where you want to set the overdub state without worrying about the current state.
When a loop is playing, it is actually one of the layers in the loop that is playing. This is called the "active layer". The active layer is usually the last layer that was created, if you are displaying the Layer Bars in the Mobius window, the active layer will be highlighted. While overdub is on, a new layer is continually being created as the active layer plays. This new layer will contain a copy of what is in the active layer adjusted for feedback, then merged with the sound coming into the track adjusted by the track's input level. When the active layer plays to the end, the new layer with the overdub is "shifted" and becomes the active layer. The overdubbed layer then begins playing and a new layer is created to record the next overdub. This process continues for as long as overdub is enabled. This means that if you never turn overdub off you may generate a lot of layers.
If you decide you don't like an overdub, you can use the Undo function to discard the new layer and return to the previous layer. You can keep using Undo to go all the way back in time to the very first layer, then start overdubbing again. See the Managing Layers section for more information on using Undo.
A very useful technique is ending a new loop recording with the Overdub function. You start by pressing Record to begin recording a new loop, then when you're ready to stop instead of pressing Record again, press Overdub. The new loop is created and begins playing and you are immediately placed in Overdub mode. This is important because when you transition seamlessly from Record mode to Overdub mode we can avoid a fade at the end of the loop.
Normally when you record a loop by pressing Record twice, the left and right edges of the loop are automatically faded to zero. This ensure that there will be no abrupt changes in sample level at the loop start point. Without these fades you would usually hear a sharp "click" every time the loop reached its end point and begin playing from the beginning because the audio waveform at the end of the loop would not exactly align with the audio waveform at the beginning of the loop.
The consequence of these edge fades is that you can't create a loop that lets a sound such as a reverb tail or a cymbal crash carry over from the end of the loop back to the start and keep going. Any sound at the end of the loop will be abruptly cut off and faded to zero.
When you end a recording with Overdub the right edge fade will not be done so the sound being recorded at the end of the loop will seamlessly carry over to the to the beginning of the next layer. You will hear the cymbal crash or the reverb tail cross the loop boundary without a "fade bump". You can now leave overdub on indefinitely or wait just long enough for the sound to decay nicely then press Overdub again to end the overdub. This can result in much more natural sounding loops because the end of the loop will gradually blend with the start of the loop.
A loop is always in one major mode which is displayed in the Mode component in the user interface. The default major mode is Play. The loop will always return to Play mode when no other modes are active. Most major modes are temporary, they begin when you execute a modal function such as Record, Multiply, or Insert and then end when you execute that function again. These are called function modes. If you are already in a function mode and then execute a different function, the previous mode is canceled and will not be restored. For example if a loop is in Multiply mode and you execute the Insert function, the Multiply mode is canceled and the loop enters Insert mode. Later when you execute the Insert function again to end Insert mode the loop will not return to the previous Multiply mode, it will return to Play mode.
A loop may be in any number of minor modes at the same time, these are displayed in the Minor Modes component in the user interface. Examples of minor modes include Reverse, Speed Toggle, and Pitch Step. Minor modes are not canceled when you change major modes. For example if you start in the Reverse minor mode when you execute the Multiply function, the major mode will change to Multiply but Reverse minor mode will still be active. Later when you leave Multiply mode and return to Play mode, Reverse will continue to be active.
Overdub is unusual because it has characteristics of both major and minor modes. Like a major mode it will be displayed in the Mode component in the user interface when it is active. But like a minor mode Overdub is not canceled when the major mode changes, it is just temporarily suspended. It will also be displayed in the Minor Modes component in the user interface so you can see when it has been suspended.
For example if you start in Overdub mode and execute the Multiply function, the major mode will change to Multiply and Overdub is suspended. Later when you leave Multiply mode you will return to Overdub mode. Overdub is the only major mode that behaves this way.
You may want to leave overdub on while you listen to the loop a few times with your instrument muted. While you are listening the loop without playing you usually don't want more layers to be created just because overdub was left on. Mobius will only generate a new layer if the maximum signal level of the sound received by the track exceeds a threshold. This threshold is set with the Noise Floor global parameter.
Most instruments generate some low-level noise when they are not being played. Keyboards may hiss or buzz, guitars generate lots of handling and string noise. If you see layers being added when you are not playing your instrument you may need to increase the Noise Floor value. If the value is zero then there will be no noise filter and every pass of the loop while overdub is on will generate a new layer. The default value is 15 which is adequate for most instruments including guitars with quiet pickups. If you need to raise the noise floor, increase the value by 5 or 10 until layers are no longer being created. You should not have to set this value above 1000, if you do please let us know. Be careful not to set the Noise Floor too high or else overdubs may be lost if you are playing softly.
If you are overdubbing a loud audio signal you need to be careful not to overload the loop. Mobius does not do any compression or limiting, if you overdub loud sounds over loud sounds you may exceed the maximum level which will cause harsh digital clipping. If this happens you will need to reduce the track input level or reduce feedback. Reducing the input level makes the new overdubbed sound quieter, reducing feedback makes the sound being copied from the current loop quieter.
If you prefer to leave the feedback control all the way up (127) Mobius can still slightly reduce the amount of feedback automatically while overdub is enabled. The amount of feedback reduction is small, approximately 5%. This can help reduce clipping if you overdub several times.
Normally this small amount of feedback reduction is not audible but you can turn it off with a global parameter. Open the Global Parameters window and locate the checkbox labeled Reduce Feedback During Overdub, uncheck the box to turn this feature off.
Normally the overdub functions do not obey the Quantize parameter, they are executed immediately when you press the function trigger. This is because you are usually merging new sound into an existing sound so controlling exactly where the "edges" of the overdub will be is not critical. If you start overdub a little early, just keep your instrument muted until you are ready to add something then mute it when you're done.
Quantized overdub can however be useful as an effect. If you keep a loud sound playing before and after the overdub, you can drop in overdubs that a very sharp attack and decay. To enable overdub quantization edit the preset and check the box labeled Overdub Quantized.
The speed shifting features allow you to adjust the playback and recording speed of the loop so that both the perceived pitch and tempo of the loop change. The most commonly known variant of speed shift drops the playback speed by one octave which many loopers call "halfspeed" mode.
Mobius offers a powerful set of functions and controls that provide many ways to change loop speed beyond just one octave down. The functions available for speed shifting are:
The controls available for speed shifting are:
The speed of the loop may be changed in either semitone steps or with very small steps to achieve a smooth continuous shift. Most of the functions and controls apply a semitone shift, The Speed Bend control applies a smooth continuous shift.
The most commonly used speed shifting function is Speed Toggle. In its default behavior, it will lower the speed of the loop by one octave, then raise it an octave when executed a second time. This is what many loopers including the EDP call "Half Speed".
Speed Toggle is however able to do other things besides halfspeed. When used in a script or with binding arguments, it can toggle between any semitone shift up or down. See the Function Binding Arguments section of the Exploring Mobius manual for more information on using binding arguments.
For example when the binding argument is set to 7, the first press of the function will raise the speed by 7 semitones, or a perfect fifth. The second press will lower it by 7 semitones. If no argument is specified the default interval is -12 which makes Speed Toggle behave like half speed functions in other loopers.
The Sustain Speed Toggle function behaves like Speed Toggle except that you do not execute it twice. It must be bound to a sustainable trigger such as a MIDI note. The speed shift is active while the trigger is held down and removed when the trigger is released.
Speed Toggle has long press behavior. If you have Speed Toggle bound to a susutainable trigger, and you hold the trigger down longer than the long-press threshold, the function will convert to Sustain Speed Toggle and the speed shift will be removed when the trigger is released.
Speed Step can change the playback speed of the loop up or down in semitones. It is a ranged function which means that it is usually bound to a trigger that supports a continuous range of values such as MIDI notes or MIDI continuous controllers. It is almost always bound to a MIDI note from a keyboard so you can change speed chromatically by playing the keyboard normally. This can make Mobius behave somewhat like a sampler.
The value of the note in the binding becomes the center point of the shift range. If you press this note the speed returns to normal. If you press notes on either side of the center note, the speed will be raised or lowered by the corresponding number of semitones. The range of notes that will cause a speed shift is determined by the Speed/Pitch Note Range global parameter. For best results, it is recommended that the center note use a MIDI channel that is not being used for any other functions. If a Speed Step note is already assigned to another Mobius function, the previous function will have priority. To avoid these conflicts use a different channel.
The Speed Shift Restart preset parameter is often set when using a ranged binding of Speed Step. This will cause the loop to be restarted whenever Speed Step is executed, similar to the way keyboard samplers behave.
When this function is bound to a MIDI continuous controller, the 0 to 127 range of the controller is scaled to fit within the Speed/Pitch Note Range. A controller value of 64 is considered "center" and will apply no speed shift. Controller values on either side of 64 will raise or lower the speed in semitones.
When this function is given a binding argument, the ranged behavior is not enabled. Instead the binding argument specifies a fixed positive or negative number of semitones. Multiple bindings with different arguments can be created to directly jump to desired speeds.
SpeedStep may also be used in scripts but it is not ranged. Instead the amount of shift is specified as an argument to the function. See SpeedStep in the Mobius Scripting manual for usage examples.
This pair of functions simply raises or lowers the speed by one semitone. You might use these if you want to raise or lower the speed in successive semitone steps but don't want to create a separate Speed Step bindings for each step.
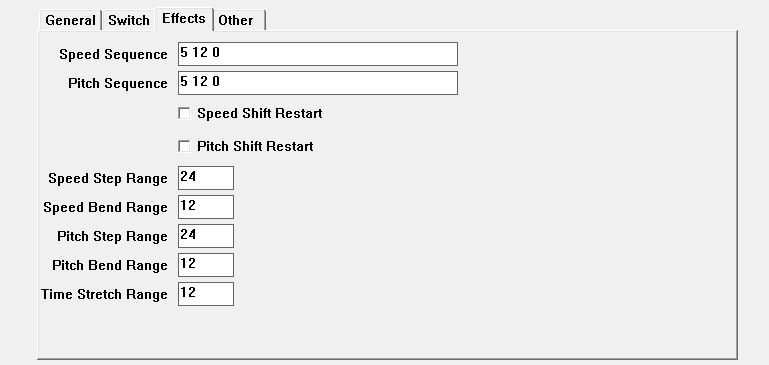
This pair of functions changes the speed in steps defined by the Speed Sequence parameter. The parameter may be set to a space-delimited list of numbers that represents positive or negative speed shifts in semitone steps. For example a speed sequence of "7 12 0" will raise the speed by a fifth, then by an octave, then return to normal.
The Speed Next function advances through the speed sequence from left to right, and the Speed Previous function advances through the sequence from right to left. You can change direction at any time.
NOTE: The current location in the speed sequence is not shown in the UI which can make this difficult to use. The location is available in scripts with the speedSequenceIndex variable. This variable may also be set to change the sequence index.
Halfspeed is an obsolete function that is provided only for backward compatibility with older scripts and bindings. It forces a non-toggling speed shift of one octave down. The same behavior is possible by creating a binding to Speed Step with an argument of -12.
Speed Cancel will remove all forms of semitone and continuous speed shift being applied to the track. It will cancel the effects of all speed functions and the speed controls, and reset the Speed Sequence index back to the beginning.
This can be useful to get things back to normal if you have been combining Speed Step, Speed Bend and Speed Octave in various ways without having to individually cancel each function and return the controls to their center positions.
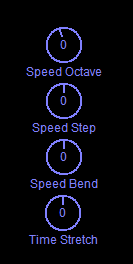
There are three controls that may be added to the track strips to display and change speed.
|
| Speed Controls |
Speed Octave is a control that can be used to change the speed up or down by one or more octaves. The maximum range is 4 octaves up or down. When bound to a MIDI continuous controller, the controller will sweep through a range of 8 octaves. The center value of 64 will result in no shift.
Speed Step will appear as both a control and a function in the binding windows. You can achieve similar effects with either target, but main difference is the way in which the binding arguments are handled.
When Speed Step is bound as a control, the binding arguments must follow the conventions of Control Binding Arguments which have values such as min, max and center.
When Speed Step is bound as a function, the binding argument may only have a single integer value which specifies the amount of speed shift in semitones.
Another difference between the Speed Step control and function is the range of values. The Speed Step control range is defined by the Speed Step Range preset parameter which defaults to 24, meaning two octaves up and down. The Speed Step function range is defined by the global parameter Speed/Pitch Note Range. Because the control range is defined by a preset parameter, you can design prests with different ranges if for example you want a control that sweeps over a smaller range of semitones.
Speed Bend is a control that can be used to change the speed up or down by very fine units resulting in a seemingly smooth or "continuous" speed change. The effect is similar to using the pitch bend wheel on a keyboard, except that it changes the speed as well as the pitch.
Unlike most controls, this one is commonly bound to the MIDI Pitch Bend trigger which has a larger range of values resulting in smoother bends. You may also bind this to a MIDI continuous controller, but these have less range and may result in a more audible "zipper" sound as you hear the speed change in small steps.
The internal range of the speed bend control is defined by the Speed Bend Range parameter. This defaults to 12 which means one octave up or down.
Note how the range of the external trigger and the internal control range combine. If you set Speed Bend Range to 1 for one semitone up or down, and then bind the control to a MIDI Pitch Bend wheel, you will get an extremely smooth speed shift because a range of 2 semitones will be divided into 16384 steps. Binding to a MIDI continuous controller by comparison will only divide the semitone range into 128 steps.
Most speed-related parameters are found under the Effects tab of the preset window.
 |
| Speed Parameters |
This is a preset parameter found under the Effects tab. It may be set set to a space-delimited list of numbers that represents positive or negative speed shifts in semitone increments. For example a speed of "1" is one semitone above normal, a speed of "-7" is 7 semitones below normal (or a perfect fifth lower). Once a speed sequence has been set, the speed may be changed using the Speed Next and Speed Previous functions.
This parameter defines the range of the Speed Step control. The default value of 24 means that the range is 24 semitones, or 2 octaves up and down for a total range of 48 semitones. The smallest value is 1 which gives you a range of 2 semitones, one up and one down.
You may wish to lower the step range when binding to a MIDI continuous controller to give you more control when selecting steps. If the range is too high, very slight changes to the knob or pedal will change speeds. With a lower range, the knob or pedal must move a longer distance before changing speeds.
This parameter defines the range of the Speed Bend control. The default value of 12 means that the range is 12 semitones, or 1 octave up and down for a total range of 24 semitones. The smallest value is 1 which gives you a range of 2 semitones, one up and one down.
You may wish to lower the bend range when binding to a MIDI continuous controller to give you a smoother and more subtle bend.
This boolean preset parameter is found under the General tab. When false it means that using any of the speed functions or controls will end a recording if one is in progress.
When this boolean parameter is true, the current loop will be restarted from the beginning whenever the playback speed is changed by the Speed Up, Speed Down, Speed Cancel, Speed Next, Speed Previous, and Speed Step functions.
This is commonly used when doing a ranged MIDI note binding to the Speed Step function so that Mobius will behave simlilar to a keyboard sampler. Once the loop is recorded, you can play it chromatically on the keyboard, retrigging the loop with each new note.
This parameter defines the range of MIDI notes or controller values that will be automatically bound to the Speed Step or Pitch Step functions. The center of the range is defined by the note or control selected in the binding window. The parameter is found under the Miscellaneous tab of the Global Parameters window.
The default value is 48 which will result in an 8 octave range to cover an entire MIDI keyboard. There is usually no need to change this, but you can specify a smaller range if desired.
You may use all of the speed functions and controls at the same time. For example if you turn the Speed Octave control to -1, then turn the Speed Step control to 12, the effect will be normal speed since when you add the effects of drop of one octave (-12 semitones) to a rise of 12 semitones, you get 0 semitones. No speed shift will be heard.
This can be especially usefull with Speed Bend. Speed Bend typically has a range of one octave up or down or lower if you want a smoother bend. By combining this with Speed Octave you can radically change the speed of the loop, then give it a subtle vibrato in any octave with Speed Bend.
Note that the combination of speed functions and controls are restricted to a maximum of 4 octaves up or down. For example if you have used the Speed Step function to lower speed by 24 semitones, then turned the Speed Octave control down to -4 you will not get a combined shift of 6 octaves down. The shift will be constrained to 4 octaves down. The Speed Octave control values of -3 and -4 will appear to do nothing until you raise it above -2.
Similarly if you have Speed Octave set to 4, the upper half of the Speed Bend control will appear to have no effect since the speed cannot be raised any more.
NOTE: Pitch Shifting is still considered a "beta" feature. It can be fun to play with, but the algorighm introduces a significant amount of additional latency when it is active, and this is not being properly compensated. This makes it difficult to use pitch shifting when you are trying to synchronize multiple tracks with different amounts of shift, or if you are synchroning Mobius to an external device.
Pitch shift is very similar to Speed Shift except that the pitch is changed without changing the length or tempo of the loop. In all other respects the functions and parameters used to control pitch shifting are almost identical to those for speed shifting.
Pitch shifting may be controlled using these functions and controls.
Pitch Step can change the pitch of the loop up or down in semitones. It is a ranged function which means that it is usually bound to a trigger that supports a continuous range of values such as MIDI notes or MIDI continuous controllers. It is almost always bound to a MIDI note from a keyboard so you can change pitch chromatically by playing the keyboard normally. This can make Mobius behave somewhat like a sampler.
See the description of the Speed Step function for more details about how to create ranged function bindings.
The Pitch Shift Restart preset parameter is often set when using a ranged binding of Pitch Step. This will cause the loop to be restarted whenever Pitch Step is executed, similar to the way keyboard samplers behave.
PitchStep may also be used in scripts but it is not ranged. Instead the amount of shift is specified as an argument to the function. See PitchStep in the Mobius Scripting manual for usage examples.
This pair of functions simply raises or lowers the pitch by one semitone. You might use these if you want to raise or lower the pitch in successive semitone steps but don't want to create a separate Pitch Step bindings for each step.
This pair of functions changes the pitch in steps defined by the Pitch Sequence parameter. The parameter may be set to a space-delimited list of numbers that represents positive or negative pitch shifts in semitone steps. For example a pitch sequence of "7 12 0" will raise the pitch by a fifth, then by an octave, then return to normal.
The Pitch Next function advances through the pitch sequence from left to right, and the Pitch Previous function advances through the sequence from right to left. You can change direction at any time.
NOTE: The current location in the pitch sequence is not shown in the UI which can make this difficult to use. The location is available in scripts with the pitchSequenceIndex variable. This variable may also be set to change the sequence index.
Pitch Cancel will remove all forms of semitone and continuous pitch shift being applied to the track. It will cancel the effects of all pitch functions and pitch controls, and reset the Pitch Sequence index back to the beginning.
This can be useful to get things back to normal if you have been combining Pitch Step, Pitch Bend and Pitch Octave in various ways without having to individually cancel each function and return the controls to their center positions.
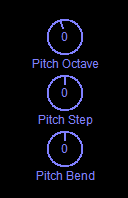
There are three controls that may be added to the track strips to display and change pitch.
 |
| Pitch Controls |
Pitch Octave is a control that can be used to change the pitch up or down by one or more octaves. The maximum range is 4 octaves up or down. When bound to a MIDI continuous controller, the controller will sweep through a range of 8 octaves. The center value of 64 will result in no shift.
Pitch Step will appear as both a control and a function in the binding windows. You can achieve similar effects with either target, but main difference is the way in which the binding arguments are handled.
When Pitch Step is bound as a control, the binding arguments must follow the conventions of Control Binding Arguments which have values such as min, max and center.
When Pitch Step is bound as a function, the binding argument may only have a single integer value which specifies the amount of shift in semitones.
Another difference between the Pitch Step control and function is the range of values. The Pitch Step control range is defined by the Pitch Step Range preset parameter which defaults to 24, meaning two octaves up and down. The Pitch Step function range is defined by the global parameter Speed/Pitch Note Range. Because the control range is defined by a preset parameter, you can design prests with different ranges if for example you want a control that sweeps over a smaller range of semitones.
Pitch Bend is a control that can be used to change the pitch up or down by very fine units resulting in a seemingly smooth or "continuous" pitch change. The effect is similar to using the pitch bend wheel on a keyboard.
Unlike most controls, this one is commonly bound to the MIDI Pitch Bend trigger which has a larger range of values resulting in smoother bends. You may also bind this to a MIDI continuous controller, but these have less range and may result in a more audible "zipper" sound as you hear the pitch change in small steps.
The internal range of the pitch bend control is defined by the Pitch Bend Range parameter. This defaults to 12 which means one octave up or down.
Most pitch-related parameters are found under the Effects tab of the preset window.
|
| Pitch Parameters |
This is a preset parameter found under the Effects tab. It may be set set to a space-delimited list of numbers that represents positive or negative pitch shifts in semitone increments. For example a pitch of "1" is one semitone above normal, a pitch of "-7" is 7 semitones below normal (or a perfect fifth lower). Once a pitch sequence has been set, the pitch may be changed using the Pitch Next and Pitch Previous functions.
This parameter defines the range of the Pitch Step control. The default value of 24 means that the range is 24 semitones, or 2 octaves up and down for a total range of 48 semitones. The smallest value is 1 which gives you a range of 2 semitones, one up and one down.
You may wish to lower the step range when binding to a MIDI continuous controller to give you more control when selecting steps. If the range is too high, very slight changes to the knob or pedal will change pitches. With a lower range, the knob or pedal must move a longer distance before changing pitch.
This parameter defines the range of the Pitch Bend control. The default value of 12 means that the range is 12 semitones, or 1 octave up and down for a total range of 24 semitones. The smallest value is 1 which gives you a range of 2 semitones, one up and one down.
You may wish to lower the bend range when binding to a MIDI continuous controller to give you a smoother and more subtle bend.
When this boolean parameter is true, the current loop will be restarted from the beginning whenever the pitch is changed by the Pitch Up, Pitch Down, Pitch Cancel, Pitch Next, Pitch Previous, and Pitch Step functions.
This is commonly used when doing a ranged MIDI note binding to the Pitch Step function so that Mobius will behave simlilar to a keyboard sampler. Once the loop is recorded, you can play it chromatically on the keyboard, retrigging the loop with each new note.
You may use all of the pitch functions and controls at the same time. For example if you turn the Pitch Octave control to -1, then turn the Pitch Step control to 12, the effect will be normal pitch since when you add the effects of drop of one octave (-12 semitones) to a rise of 12 semitones, you get 0 semitones. No pitch shift will be heard.
Like Speed Combinations, the pitch shift range is limited to 4 octaves up or down.
Time Stretch is an effect that combines Speed Shift and Pitch Shift to change the length and tempo of a loop without changing the pitch. Note that because Time Stretch relies on the Pitch Shift algorithm, it will have similar issues regarding added latency which can cause synchronization problems and a slight gap in the audio when as you change the amount of stretch. These issues will be addressed in future releases, until then we consider this a "beta" feature that needs to be used with caution.
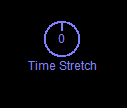
Time stretch is accomplished by binding to the Time Stretch control, there are no functions for time stretch. Like the Speed Bend and Pitch Bend controls, this can be bound to either the MIDI pitch wheel or to a continuous controller. The internal range of the time stretch control is defined by the Time Stretch Range preset parameter.
 |
| Time Stretch Control |
In the UI, the Time Stretch control will be shown with a value of zero in the center position when there is no time stretch being applied. When the MIDI pitch wheel is at the center position or the MIDI continuous controller is held at value 64, the value of the control will be zero and there is no time stretch. As the trigger value rises, the loop is compressed so that it becomes shorter and the tempo becomes faster. As the trigger value falls, the loop is expanded so that it becomes longer and the tempo becomes slower.
Although time stretch combines Pitch Shift and Speed Shift it is not canceled by either the Pitch Cancel or Speed Cancel functions. You must cancel time stretch by returning the Time Stretch control to its center position.
The effective range of the time stretch is controlled by the preset parameter Time Stretch Range found under the Effects tab. The defalut value is 12. Like Speed Bend Range, this value is a number of semitones, where 12 means one octave up or down.
The notion of a semitone range is confusing when applied to time stretch, since the purpose is to not change the pitch. Instead think of it this way, a one octave speed shift down results in a loop that lasts twice as long. For time stretch, a one octave shift down also results in a loop that is twice as long, but the pitch doesn't change. So for time stretch, the number 12 means the control has a range that will either double the loop length or cut it in half, but the pitch will not change.
Since time stretch is just a combination of Speed Shift and Pitch Shift it can be used at the same time as the other functions and controls for speed and pitch shifting. For example if you time stretch a loop to make it twice as long, then use Pitch Octave to lower the pitch one ocatve, the result is the same as using the Speed Octave control to lower the pitch and speed by one ocatve. If you bind all of the speed, pitch, and stretch controls to knobs on a MIDI control surface, you can have a lot of fun mutating the loops into unrecognizeable slow drones, or insect fights.
Tracks may contain several loops but only one loop at a time can be selected for playing or recording. This is called the active loop. Changing the active loop in a track a track is called loop switching. Loop switching is a complex topic because there are many options available to control when the switch happens and what happens to the new loop after it is activated.
Often you will want to use switch quantization to control when the loop switch will happen relative to the loop that is currently playing. This is important if you want to maintain a steady rhythm, for example letting the current loop play to the end before switching.
If the next loop is empty you will often want to automatically begin recording into it, or copy portions of the current loop into it so you can begin creating variations.
One of the most common uses for loop switching is to record "song parts" such as verse A in loop 1, verse B in loop 2, and a chorus in loop 3, then switch between those at rhythmically precise times.
You can also use track loops as a primitive sample player where each loop contains a different sound that when triggered plays from beginning to end and then stops.
The following functions will do some form of loop switch.
The Next Loop function will activate the next loop in the track. If the last loop is currently active, Next Loop will wrap back around and activate the first loop. The Previous Loop function works in the opposite direction, activating the previous loop. If the first loop is currently active Previous Loop wraps and activates the last loop.
The Sustain Next Loop and Sustain Previous Loop functions must be bound to a sustainable trigger . If they are not, they behave the same as Next Loop and Previous Loop. The sustain functions will switch to the new loop while the function button is held down, then they return to the original loop when the function button is released. Note that you can get sustain behavior with other loop switching functions by setting the Switch Duration parameter.
The Restart function starts the current loop over from the beginning. It may not sound like this would be a loop switch but it behaves like a switch away from and then immediately back to the current loop. The RestartOnce function restarts the current loop, lets it play to the end and then automatically enters Mute mode.
The numbered Loop functions switch directly to the numbered loop. If that loop is already selected these functions behave the same as Restart.
If you want to maintain a steady rhythm as you switch between loops you will usually want to use some form of switch quantization to make the switch happen at an exact time. Switch quantization is not controlled by the Quantize parameter like most functions. Instead there is a dedicated parameter named Switch Quantize that is used for all loop switch functions. This parameter may have the following values.
When the value is Off the switch will happen immediately when you press the function button.
When the value is Subcycle, Cycle or Loop the switch will be delayed until the next quantization point. You will see a white event marker under the loop meter showing when the switch will happen and the loop will enter Switch mode.
When one of the four Confirm values is selected, an extra confirmation action will be required before the loop switch will happen. After you use any of the loop switch functions, the current loop will first enter Confirm mode and wait there indefinitely. You must then execute the Confirm function to confirm the switch. See the Switch Confirmation section for other confirmation options. What happens after the confirmation action depends on which Switch Quantize parameter value was selected. If the value was Confirm the switch will happen immediately. If the value was Confirm Subcycle, Confirm Cycle, or Confirm Loop the loop enters Switch mode and waits for the next quantization point before switching.
Note that while you in either Confirm or Switch mode many functions will behave differently than they normally do. This is sometimes referred to as the "switch quantization period" and by some older EDP users as "lame duck period". This is described in detail later in the Switch and Confirm Modes section.
If you have Switch Quantize set to any of values beginning with the word "Confirm" you must execute another function to cancel the confirmation mode and proceed with the loop switch. The default function for canceling confirmation mode is Confirm. This function has no other use besides switch confirmation. If you try to execute it when the loop is not in Confirm mode it will have no effect.
You may not want to assign one of the precious buttons on your foot controller to the Confirm function since it is normally useless. It is possible to select other functions that will behave as a switch confirmation action by setting the global parameter Switch Confirmation Functions. In the Global Parameters window, select the Functions tab and locate the item selector labeled Switch Confirmation Functions. Select the functions you want to use for confirmation and move them to the right.
If you are familiar with the EDP, you may want to use the Undo function for confirmation since that is the only way to do switch confirmation on the EDP. We here at the labs don't like using Undo for confirmation because it makes it impossible to cancel the loop switch or remove "stacked" functions. We recommend one of the following functions that are often assigned to a footswitch button but are not often used during the switch quantization period.
While a loop is in Confirm or Switch modes many functions will behave differently than they normally do. This is sometimes referred to as the "switch quantization period" or by some older uses as the "lame duck period".
Most functions you execute will simply be delayed until after the switch. This is called function stacking. In the user interface, you will see the function names stacking under the loop switch event marker. This can be used to queue up interesting combinations of functions and have them all execute exactly at the same time after the switch. For example, putting the next loop into Reverse, Speed Toggle, and Substitute modes all at once.
Until the switch occurs you can use Undo to remove stacked functions if you trigger the wrong one or decide you don't want it. Once you have removed all the stacked functions and you are left with only the switch event marker, using Undo will cancel the switch and leave you in the current loop.
NOTE: The EDP uses Undo as the switch confirmation action. If you like this and have Undo set in the Switch Confirmation Functions global parameter, then you will not be able to use Undo to undo the stacked functions and cancel the switch when you are in Confirm mode. You can however use Undo normally while in Switch mode.
A few functions have special behavior when executed during the switch quantization period.
A Sound Copy creates an instant copy of the original loop in the next loop. A Time Copy creates a clear loop of the same size as the original loop, but does not copy over any of the audio content. Both of these concepts are described in more detail later.
The difference between Overdub and Multiply is what mode the loop will be left on after the sound copy. When Overdub was stacked, the loop will always be left in Overdub mode if a sound copy occurred. If Multiply was stacked the loop will be left in the mode specified by the Sound Copy Mode preset parameter.
If you switch to a loop that is empty, the Empty Loop Action parameter will be used to determine what happens after the switch. The possible values for Empty Loop Action are:
When set to None, no automatic action will be performed. The loop will be left in Reset mode.
When set to Record, the loop will immediately enter Record mode after the switch. You can record as long as you like but you must remember to execute the Record function to end the recording.
When set to Copy a Sound Copy will be made from the original loop into the new loop.
When set to Copy Timing a Time Copy will be made from the original loop into the new loop.
Copy Timing and less often Copy Sound are very useful because they let you creating synchronized loops that are exactly the same size or an exact multiple of a common factor. See the Loop Copy section of the Mobius Synchronization manual for more information on creating synchronized loops.
When Empty Loop Action is set to Copy Timing and you switch to an empty loop, a new clear loop will be instantly created that is exactly the same size as the previous loop. This is called a Time Copy. Review the Reset, Empty, Clear, and Silent section of the Getting Started manual if you are not sure about the difference between "empty" and "clear". A clear loop has a size and it can be played and modified, it just starts out with no audio content.
In addition to copying the size, time copy will also copy the number of cycles.
When you first switch to a time copied loop, you will be placed in a mode defined by the Time Copy Mode preset parameter. The possible values are:
The default value is Insert.
When Time Copy Mode is set to Play the copied loop will simply start playing. When set to any of the other values, it behaves as if that function were automatically executed immediately after the copy. You must then remember to execute that function again to cancel that mode. For example, when Time Copy Mode is set to Insert you will immediately begin inserting into copied loop. You must press the button for the Insert function when you are finished.
The values available here are the same as those available for Sound Copy Mode. This means you can select Multiply but this is less useful after a time copy because there is no audio content to repeat so Multiply behaves almost the same as Insert. The main reason to use Multiply here is if the source loop had several cycles and you wanted to immediately use "remultiply" to remove some of the cycles from the end. See Shortening The Loop for more information on using the Multiply function to make the loop smaller.
When Empty Loop Action is set to Copy and you switch to an empty loop, the current loop will be instantly copied to the next loop. This is called a Sound Copy. From the listener's perspective, they won't know the copy happened, they will still be hearing the original loop.
You may now begin changing the copied loop using Overdub, Multiply or any other function. When you are finished modifying the copied loop you can use the same technique to create another loop, or you may switch back to the original loop.
When you first switch to a copied loop, you will be placed in a mode defined by the Sound Copy Mode preset parameter. The possible values are:
The default value is Multiply.
When Sound Copy Mode is set to Play the copied loop will simply start playing. When set to any of the other values, it behaves as if that function were automatically executed immediately after the copy. You must then remember to execute that function again to cancel that mode. For example, when Sound Copy Mode is set to Multiply you will immediately begin multiplying the copied loop. You must press the button for the Multiply function when you are finished multiplying.
Some people find it convenient to assign the Play function to a button. Play is like a universal mode canceling function, if you are in any recording mode (Record, Multiply, Insert etc.) pressing Play will cancel that mode and return you to Play mode. So after you have performed a loop copy you don't need to think about Sound Copy Mode and execute the corresponding function to end the mode, just use Play and it will cancel whatever mode you are in.
The Switch Location parameter determines where the playback position will be after you switch to another loop. The possible values are:
When using Follow, if the new loop is smaller than the current loop the playback position may need to be "wrapped" so that it fits within the new loop. For example if the current loop is 6 seconds long and you are currently at the start of second 5, then you switch to a loop that is 3 seconds long, the new loop location will be at the start of second 2.
When using Restore, if the new loop has never been played the location will be at the start. If you are using one of the methods to perform a sound copy or a timing copy (see Empty Loop Action) then the location will not be restored.
Switch Location only applies if the loop is not empty (in Reset mode). If the loop is empty then the new location will always be at frame zero of the empty loop.
The Switch Duration parameter determines how long you will stay in the new loop after a switch. This parameter is used by all switch functions except Sustain Next Loop, Sustain Previous Loop, Restart, and Restart Once. The possible values are:
The most common option is Permanent, you remain in the new loop until you change it with another loop switch function.
The Once option when combined with a Switch Location value of Start makes the loop triggering functions behave similar to a sampler. The loop always starts playing from the beginning, plays once, then stops (enters mute mode).
The Sustain option must be used with a switch function bound to a sustainable trigger . If you use a non-sustainable trigger then this will behave the same as Permanent, you will remain in the new loop but it will not enter Mute mode automatically.
The Sustain Return option must also be used with a switch function bound to a sustainable trigger . If you use a non-sustainable trigger then this will behave the same as Permanent.
Note that when Switch Duration is set to Sustain Return the Next Loop function behaves the same as the Sustain Next Loop function. Sustain Next Loop, and Sustain Previous Loop will always return to the original loop when the sustain ends. They ignore the Switch Duration parameter.
The Restart and Restart Once functions ignore the Switch Duration parameter. Restart always behaves as if Switch Duration was set to Permanent and Restart Once always behaves as if Switch Duration was set to Once.
If you switch to a loop with the Switch Duration parameter set to Once Return or Sustain Return you will eventually be automatically returned to the original loop unless you cancel the return. The Return Location parameter determines where you will begin playing in the original loop. The possible values are the same as the values for the Switch Location parameter.
When using Follow, if the original loop is smaller than the current loop the playback position may need to be "wrapped" so that it fits within the new loop. For example if the current loop is 6 seconds long and you are currently at the start of second 5, then you return to a loop that is 3 seconds long, the new loop location will be at the start of second 2.
When you execute any of the loop switch functions, you can choose to have some of the current loop modes carried over to the next loop. This is controlled with a set of "transfer mode" preset parameters found under the Loop Switch tab.
The Record Transfer parameter determines whether the Record major mode will be carried over from the current loop to the next loop. It has these possible values.
When this parameter is set to Follow, if the current loop is in Record mode, after the switch the next loop will also automatically enter Record mode. Note that this will happen whether or not the next loop is empty. This option is useful if you want to record a set of loops all at once without stopping. Start by executing the Record function to record the first loop. Then execute the Next Loop function to end the current recoding and immediately begin recording the next loop.
When this parameter is set to Off and the current loop is in Record mode, executing a switch function will finish the recording of the current loop then switch to the next loop. If the next loop is not empty it will simply start playing. If the next loop is empty the Empty Loop Action parameter controls what will happen.
The Overdub Transfer parameter determines whether the Overdub minor mode will be carried over from the current loop to the next loop. It has these possible values.
The default value is Off. If you like to leave overdub mode on all the time and control overdubbing by muting your instrument you may want to set this to Follow so you don't have to reactivate overdub every time you switch loops.
Setting this to Restore is relatively unusual because you usually care more about what the overdub state is now, not what it was in the past.
The Reverse Transfer parameter determines whether the Reverse minor will be carried over from the current loop to the next loop. It has these possible values.
The default value is Off. If you think of reverse as a "global" option that should apply to all loops in a track then set this parameter to Follow.
Setting this to Restore may be interesting if you want to have some loops that always play forward and some that always play in reverse.
The Speed Transfer parameter determines whether the various speed related minor modes will be carried over from the current loop to the next loop. This applies to shift applied by all of the Speed functions as the speed controls. It has these possible values.
The default value is Off. If you think of speed shift as a "global" option that should apply to all loops in a track then set this parameter to Follow.
Setting this to Restore may be interesting if you want to have loops that always play at different speeds.
The Pitch Transfer parameter determines whether the various Pitch related minor modes will be carried over from the current loop to the next loop. It has these possible values.
The default value is Off. If you think of pitch shift as a "global" option that should apply to all loops in a track then set this parameter to Follow.
Setting this to Restore may be interesting if you want to have loops that always play with different amounts of pitch shift.
The Switch Velocity Sensitive parameter can be used to automatically adjust the track output level during a loop switch. This can only be used if the loop switch function is bound to a MIDI Note message that can carry velocity information. When this parameter is checked, the output level of the track will be set to the velocity value of the MIDI note that triggered the loop switch function. If a loop switch function is not bound to a MIDI Note message, then this parameter will be ignored.
This is most often used with the 8 numbered Loop X functions bound to adjacent keys on a MIDI keyboard, or to velocity sensitive pads on a control surface. Once loops have been recorded you can then "play" the loops by triggering them from the MIDI device making them softer of louder depending on how hard you hit the key/pad. If you also set the Switch Location parameter to Start and the Switch Duration to Once it will behave like a simple velocity sensitive sample player.
The Restart and Restart Once functions are considered to be loop switch functions but they are unusual because they do not change the loop. They always restart the current loop from the beginning and stay in the current loop.
They will obey the Switch Quantize parameter so that you can stack functions to be executed after the restart. But they ignore the Switch Location and Switch Duration parameters.
Since the loop does not change all of the Switch State Transfer parameters are also ignored.
Loop Windowing is a mode that allows you to move backwards and forwards within the loop history and play sections of the loop at that time. It is somewhat like Undo and Redo but with more control over the position and size of the new loop. Think of all the loop layers as being connected in a single length of recording tape, then being able to instantly rewind to any position within that tape and play a section of any length. This "window" into the loop history can then be adjusted by sliding it forward and backward, and the starting and ending edges of the window can be adjusted independently to fine tune the size of the window. Windowing can be unpredictable and well suited for "glitch" looping, but with careful use of quantization and the windowing parameters you can also create interesting rhythms that maintain a consistent tempo.
There are six functions that can be bound to phyiscal controllers to change the window position and size.
In addition there are two functions that may be used in scripts for even more control over the window.
The following preset parameters control how the window is moved and sized.
Though it is not required, loop windowing is usually performed after doing an "unrounded multiply" or a "remultiply" to cut the loop down to a shorter length. Unrounded multiply is the Multiply function followed by the Record function which can cut out a section of any size. Remultiply is Multiply followed by another Multiply within a loop that has more than one cycle to cut out a section that is exactly some number of cycles. Other functions that reduce the size of the loop include Divide, Trim Start, and Trim End.
Once the loop length has been reduced, you then start by using the Window Backward function one or more times. With the default parameters you will move backward an amount equal to the current loop length. If you have not changed the length of the loop, the effect will be similar to using Undo, you simply move backward in the loop history one layer at a time. But if you have shortened the loop, you will be playing subsections of layers, or sections from different layers as you move the window. After you have moved the window backward, you can use the Loop Window Forward function to move it in the other direction, up until you return to the most recent loop. The effect is similar to Redo but you are not limited by layer boundaries.
The amount of time the window is moved forward or backward is controlled by the Window Slide Unit and Window Edge Amount preset parameters. Window Edge Amount is a positive number and Window Slide Unit may have the following values:
The default value is Loop which means you slide the window by the current length of the loop. Setting this to Cycle or more often Subcycle lets you slide the loop by smaller amounts but still maintaining an exact mathemetical relationship to the original loop. The Millisecond and Frame units give you more control over the length of the slide, but since the values may not be musically related to the original loop these are best used for unpredictable "glitch" looping.
The Window Slide Amount parameter is usually left at 1 for Loop, Cycle, and Subcycle units. This value is a unit multiplier so with a unit of Subcycle and an amount of 4 you will slide forward or backward by 4 subcycles.
For the Millisecond unit, the Window Slide Amount is the a number of milliseconds, so 1000 would slide the window forward and backward by 1 second. For the Frame unit, the slide amount is the number of frames, which are pairs of stereo samples. Determining the length of the slide in frames depends on your sample rate selection in the Audio Devices window. With the default sample rate, entering 44100 as the amount would result in a slide of 1 second.
Sometimes after sliding a window, you may want to add or remove a little from the start or end of the new loop. The Window Start Backward and Window Start Forward funtions move the start of the window without changing the end, and the Window End Backward and Window End Forward change the end of the window without changing the start. The amount the window is resized is controlled by the Window Edge Unit and Window Edge Amount preset parameters. Window Edge Amount is a positive number and Window Edge Unit has the same values as Window Slide Unit.
The default value for Window Edge Unit is Subcycle which is useful for creating loops that maintain remain at the original tempo. Millisecond or Frame can be used to fine tune the window edges.
You can use the windowing functions in any combination, for example sliding the window backward, changing the starting and ending edges, then sliding the modified window forward. When you reach the beginning or ending of the loop history, it may not be possible to change the loop by the selected unit. For example if you are at loop frame 10,000 and a subcycle is 20,000 frames long and you then use the Widow Backward function with a Window Slide Unit of Subcycle you cannot move backward 20,000 frames. The slide will be limited to what is available, 10,000 frames. This may mean that when you reach either end of the loop history, the window position may shift so that when you slide in the opposite direction you won't be playing exactly the same windows that were playing when you were sliding toward the history edge.
Once you use any of the loop windowing functions, a new layer is created called the "window layer". Any modification you have made to the current layer are lost. For example, if you are in the middle of the loop and Overdub mode was on, the last overdub will be discarded and will not be part of the loop history. The window layer differs from other layers in that it can be changed by the windowing functions without creating a new layer for each change. You could slide the window forward and backward 100 times, but there will still be only one window layer.
While a window layer is active, you are in the Window minor mode. The word "Window" will appear in the Minor Modes display component if you have it enabled. The Loop Window display component will also appear to show you a graphical representation of the loop history and the position of the window within it. If you are upgrading from an earlier release, the Loop Window component will not be enabled, you will need to use the Display Components dialog and add it to the Components list at the top.
If you decide you no longer want the window layer, use Undo to cancel Window mode and return you to the previous normal layer. If you have selected a window that you would like to keep, you may simply keep playing the window or begin modifying it with other functions such as Overdub and Multiply. If you make changes to the window layer and you let it play to the end without using any of the windowing functions, then the window layer is added to the loop history and you exit Window mode.
It is important to understand the relationship between Window mode and the Feedback control. If you have reduced Feedback you are making a change to the layer being played. You are recording a new layer containing the layer being played at a reduced level. If you are in Window mode with Feedback lowered and you let the window layer play to the end, the window layer will be added to the history and you will exit Window mode. This can make it difficult to position the window if the window is short. The window will quickly play to the end and cancel Window mode before you have a chance to slide the window to the desired location. For this reason it is recommended that you do not leave Feedback lowered or be in Overdub mode when you use windowing functions.
The loop window may be controlled from scripts using the WindowMove and WindowResize functions. These functions will not appear in the binding windows, they are only available in scripts. The location and size of the window is specified with function arguments. This is described in more detail in the Loop Windowing section of the Mobius Scripting manual.
The Bounce function allows you to capture the output of several tracks, mix them together, and copy the result into an empty track. This is similar to the bounce down mixing technique used with a multi track recorder.
When the Bounce Record function is first called, it begins capturing the output of any track that is currently playing. The track output is mixed together "post fader" so the Output Level control of each track may be used to control the track mix in the recording.
When Bounce Record is called a second time, the captured and mixed track output is copied to the first empty track (from the left). The source tracks are then immediately muted, and the new track immediately begins playing. This new track contains a single loop with the captured output from the other tracks. This loop can then be manipulated as usual.
Any number of bounce recordings can be made, but you must have at least one empty track. If there are no empty tracks when the second Bounce Record is called, the recording is thrown away.
Note that bounce recording is a special kind of "global mode" that is not related to any particular track or loop. While you are bounce recording, you can be manipulating tracks and loops in any way, including recording new loops, multiplying, overdubbing, triggering, and speed shifting. Mobius is recording the entire process.
Bounce recording can be especially useful with the Restart, Speed Shift and Pitch Shift functions. Once a loop is created, you can play a chord progression using Speed Shift or Pitch Shift, record the result of that performance, and bounce this into a new track to serve as a background loop.
The timing of the bounce recording may be controlled with the Bounce Quantize parameter. Bounce quantization is not affected by the Quantize parameter that is used with other functions. This is because bounce quantization is almost always set to Loop or Cycle, but you may not wish to use this same quantization for the functions that build the loop.